Hooves, Heels, and Wheels

Exploring historic places by horseback, foot and vehicle ...


Saturday, January 1, 2011

Fort Sumter National Monument


In Charleston harbor lays a dilapidated mound of brick and concrete set upon a man-made island. Though only 3 stories tall at the time, and holding a scant 85 men, Fort Sumter towered in significance in late 1860 and early 1861, achieving a symbolism far out of proportion to it’s actual value. Debates can surge to and fro as to what “caused” the American Civil War, but history has a way of taking special note of that moment when the first shot is fired and noting who fired it. It is a watershed moment in the story of any conflict, the moment when debate and argument give way to violence and bloodshed – the moment between dialogue and destruction, negotiation and killing, peace and war.

With a certain poetry and irony, the attack on Fort Sumter set the tone for the awkwardness of the Civil War, a war where men who were close allies, friends and even family members on one day found themselves mortal enemies the next. Designed to protect Charleston harbor, it first came under fire from Charleston. The officer in charge of the Union garrison found himself being shot at by one of his former and favorite pupils. There were no casualties during the bombardment, which bloodlessly began the bloodiest war in US history.

Background
Practically all US coastal cities have forts. Philadelphia has Fort Mifflin. Baltimore has Fort McHenry. New York City has old Fort Wood, upon which the Statue of Liberty now stands. Charleston has Forts Sumter and Moultrie. These forts where built in the 1700s and 1800s to protect their cities from naval attack. In the days before air forces, a fully armed and manned fortress was a city’s first, last and best chance to defend itself from an enemy attack. Like US military bases today, US servicemen, not local inhabitants manned the forts.

The five-sided Fort Sumter was started in 1829. Like many federal projects in the south, slave labor was used for some of the grimiest jobs in building it. Work was slow, and the fort was still not entirely completed when, in 1860 it became the focal point of national attention. The storm clouds of conflict, which had been forming for as long as 40 years or longer, were about to break in Charleston harbor.

Election, Secession, Evacuation
In November of 1860, Abraham Lincoln was elected the 16h president of the United States. Elected on a very mild anti-slavery platform (advocating its restriction, rather then its abolition) Lincoln won nearly every Northern state, while not even appearing on the ballot in some Southern states. In the minds of many Southerners, Lincoln’s election was a signal that the country was about to be greatly changed in ways they wanted no parts of.

On December 20th, 1860 South Carolina unanimously voted to secede from the Union, and did not even try to hide the fact that the perceived jeopardy of the institution of slavery was their chief cause. At that moment, the people of South Carolina considered themselves an independent country, and that US army troops on their soil were, by definition, trespassers.
US Army Major Robert Anderson was keenly aware of the danger to his command, and had to decide what to do about it. He was in charge of four federal installations around Charleston. Castle Pickney was near the city itself. Fort Johnson was on James Island, south of the city. Fort Sumter was out in the middle of the harbor. Anderson and most of his men were stationed at Fort Moultrie, on the north side of the harbor at Sullivan’s Island.

From his quarters at Moultrie, Anderson looked at his less-then-encouraging situation. With only 85 men, there was no hope of defending all 4 places. In fact, there wasn’t even any hope of defending Fort Moultrie. The fort was simply too big to be protected by a scant 85 men. Fort Sumter would surely be the easier fort to defend. On Christmas night, 1860, five days after the South Carolina seceded, Anderson secretly rowed his men out to Fort Sumter.


On December 27th, South Carolina militiamen manned all the other abandoned works, including the just-vacated Fort Moultrie –and pointed their weapons at Ft. Sumter.


The Beginning of War

Negotiation and Ultimatum

For nearly four months, South Carolina gunners glared at Sumter over the muzzles of their cannons. By February 1861, the South Carolinians were more properly known as Confederates, as several more states had decided to break away from the Union.

Demands from South Carolina and the Confederacy that the Ft. Sumter garrison be removed were refused. Ft. Sumter was a US Army installation, South Carolina was a US state, and president James Buchanan, (and later Lincoln) could not order a retreat from his own soil.

On March 4th, Abraham Lincoln was inaugurated as president. Denying the right of any state to break away from the Union all states had created, Lincoln began looking into ways of reinforcing Anderson and his garrison. By April 4th, a reinforcement and re-supply task force had been assembled.

Learning of the expedition, the new Confederate government issued its first War Orders to the Confederate Commander in Charleston, Gen Pierre G.T. Beauregard on April 10th. Fort Sumter must be immediately evacuated and surrendered, or be fired upon. Beauregard transmitted the demand on April 11th to Anderson, his former instructor and mentor at West Point.

Although his fort was ringed by his new enemies at Forts Moultrie, Johnson, Castle Pickney, and several new batteries that the Confederates had built in the prior few months, Anderson refused the surrender. The surrender demand was generously repeated at 3:20 am on April 12, with the notification that this was the final offer. If refused, the fort would be attacked in an hour. Once more, Anderson resolutely stood his ground. No rebellious forces were going to get his fort without a fight.

In Charleston, the bells of St. Michael’s Church tolled 4:30 am.

Sumter’s Shell Storm
In Fort Johnson, Confederate Captain George James ordered one of his mortars to fire a single shell as a signal to the entire harbor. Fort Sumter at that hour appeared little more then a black mound in the bay, just discernable in the pre-dawn light. The large coastal gun boomed, sending its projectile into the April night. The shell hissed and fizzed as it drew an arc over Charleston harbor, ending directly above Fort Sumter, where it exploded twenty or so feet above the ramparts. Immediately, every cannon and mortar in Charleston harbor roared to life, countless shells shrieked towards Sumter. Explosions tore the airspace around the fort, and wreathed the structure in thick gray smoke. By 5:30 that morning, the eastern sun was rising on the first day of the American Civil War.


Fort Sumter had been designed to defend Charleston Harbor from outside invasion, not to defend itself against its sister forts. Sumter’s guns were mostly short rage, anti-ship weapons, and not anti-fort guns. From the beginning, Major Anderson knew he had only a slim chance of winning this battle. Since the fort had been all but abandoned before he had moved his command from Moultrie, there was not a great deal of ammunition for a proper fight. Anderson ordered token resistance, only shooting ten out of his sixty guns in self-defense. He strictly ordered his men not to man the heaviest guns he had, as they were on the forts upper level and crews would be completely exposed to enemy fire. The guns he did fire were in protected casemates in the lower two levels. Of all the Confederate batteries firing on him, his counter-fire could damage only Ft. Moultrie.

That same day, the relief expedition under former navy captain Gustavas Fox stood just outside the harbor. Fox had been ordered by Lincoln to relieve the fort, but lack of warship cover and high seas meant that he’d have to wait and try until the night of April 13th.

Fort Sumter was not going to hold out that long. The gunpowder and cartridge supply was dwindling, and the Confederates were setting the fort on fire by firing “hot-shot”, cannon balls preheated in a furnace before being fired from a cannon. The barracks, water supply tower and staircases were gone. Federal gunners were gasping for breath in the smoky casemates. Finally, as the bombardment reached it’s 33rd hour, Fort Sumter’s flagstaff was shot away. At 2 pm, Anderson agreed to a truce in the fighting. At 7pm on April 13th, 1861 the final terms of surrender and evacuation were agreed upon. The Fort would be evacuated, Anderson and his men would be free to leave and go north.

Nobody on either side had been killed or seriously wounded during the bombardment. Indeed, the only fatalities happened on April 14th, while the Union troops were firing a salute to their flag as it was being lowered. An accidental gunpowder explosion claimed two lives. Sadly, the ensuing Civil War, by then three days old, would claim more then 600,000 more.

Confederate Bastion
Fort Sumter now began its new career as a Confederate fort. For the next 4years, it would be an annoying thorn in the Union side, and of course, a proud symbol of southern defiance. Far more blood would be spilled by the Union trying to take back the fort, then had been shed trying to defend it in April 1861.
On April 7th, 1863, a navy attack was made with 9 heavily armored Union ships to attack the fort. It was hoped that the ironclad ships would be able to take the fire from the fort long enough to batter down the forts walls at point blank range. This turned out not to be so, and the ironclad attack failed. Five Union ships were disabled, one of which sunk.

On August 17th, 1863 heavy duty cannons were set up on Morris Island to the south of Sumter. Sumter was now under constant siege, and the walls of the fort were gradually weakened. But the fort was still manned by the Confederates.

On September 9th, a Union amphibious assault resulted in a bloody fiasco that cost the Union 5 boats and 124 men killed wounded and captured. The storming of Sumter failed spectacularly.

The siege went on, with Sumter being bombarded on and off for the rest of 1863 and 1864. By early 1865, the “fort” was little more then a pile of broken bricks, dirt and dust – manned by Confederate troops.

Fort Sumter –along with the rest of Charleston -- was finally abandoned by Confederate troops in February 1865 as the Union army under Gen William T Sherman cut off Charleston. Robert Anderson – now a General- raised the same flag over the ruins of his old fort that he had been forced to take down in 1861.

Later Uses for Fort Sumter
Post-Civil War, Fort Sumter saw service as a lighthouse. Then during the Spanish American war, the gigantic Battery Huger was built in the middle of the old fort’s parade ground. Two huge cannons, with rages of 9 miles, were placed there. Once again, Ft. Sumter was on guard against attack – an attack from the Spanish that never came. Sumter housed an anti-aircraft battery during World War II. Finally in 1948 it became a National Monument.


Touring Fort Sumter


Fort Sumter is of course only reachable by boat. The Visitor Center for the National Monument is actually at the ferry slip in downtown Charleston. This is on the eastern end of Calhoun St. Boats only leave a few times a day, giving visitors plenty of time to explore the exhibits in the museum. The museum does an admirable job of explaining the causes of tension, dissention, and disunion in the first half of the 1800s, with special focus on the institution of slavery. Not to be missed is the small model of Fort Sumter as it appeared in 1861, an imposing 3 story tall fortress.


The boat ride is perhaps 45 minutes to the fort. While in transit recorded messages on the ferryboats point out some interesting sights in Charleston harbor, including the Charleston Battery, Patriots Point, and Castle Pickney. The best place to stand is on the bow, where lucky passengers might catch a glimpse of dolphins playing by the prow of the boat!

The Fort itself can perhaps be a rude awakening for tourists. The impressive fort that guarded the harbor in 1861, was smashed to rubble by the Union during the course of the war. The fort was never rebuilt to its antebellum glory. Now it’s about a story and a half tall, and has only few traces of the casemates and guns that were manned by Anderson’s men.


The gigantic black mass of Battery Huger dominates the interior of the fort, and makes it very difficult for a visitor to mentally put himself back in 1861. Remember, unlike Gettysburg or Antietam, which had brief, bloody moments of fame, Fort Sumter was a US Army installation well into the 20th Century, and was thus changed to serve changing Army needs, with little thought given to preservation.

The guns of Battery Huger are long gone, and the mass of poured concrete now houses a museum. Visitors have about an hour to tour the fort, which is almost enough time for the very interested. The Ranger talk describing the opening bombardment cuts into touring time, but was in my case, worth it.


Much of the fort is ruins, with exhibits explaining how they became ruined. Tourists can visit the remains of the powder magazine, and the casemates on the left face, right face, and left flank.


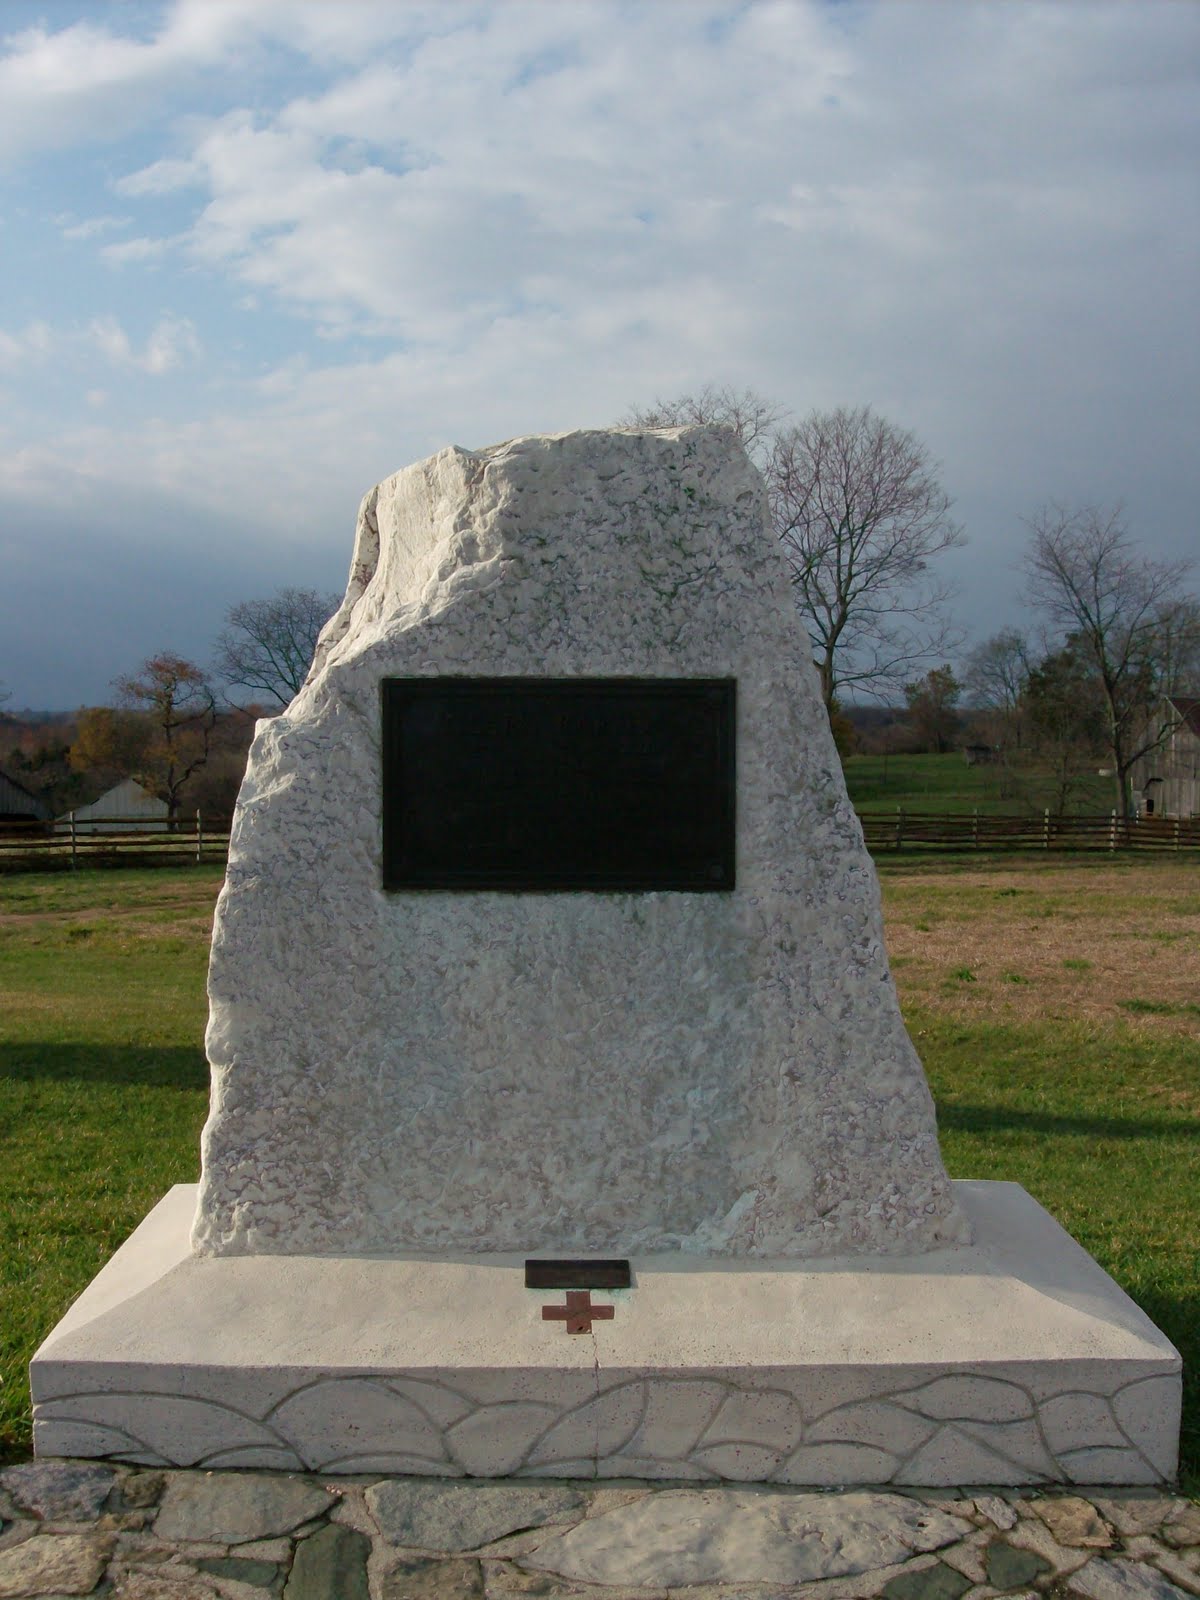
Two monuments are key to the Sumter story – one for the Union garrison that defended it in 1861, and one for the Confederates that held it under siege from 1861 to 1865. There’s also a small exhibit on the Right Gorge Angle that describes the infantry attack in September 1863.


The viewer’s eyes will be drawn to the assembly of six flags that flutter in the harbor breeze. One is the US Flag of 1861, with 33 stars, similar to the flag that Anderson flew. Next to it is the First National Confederate Flag, the “Stars ‘n’ Bars” with its 3 large stripes. Then comes the South Carolina State flag. This flagpole has a red band around the pole to signify how high the fortress’s walls used to be. The next flag is the Second National Confederate Flag, the “Stainless Banner”. Completing the arc of five flags is the 1865 US Flag with its 35 stars, which was flow above the fort when it was recaptured. In the center of this arc is the largest and grandest flag of them all, a contemporary, 50 star, US Flag.


Fort Sumter is famous –and thus oft visited- because of its status as the beginning place of the Civil War. Interestingly, and perhaps disappointingly, it has later stories to tell, such as the Confederate occupation of it, and it’s Spanish American War History. The varying stories conflict, and crowd each other on this tiny man made island.

Fort Sumter will always be compared with Lexington and Pearl Harbor – a place where words, threats and diplomacy ultimately failed and the place where violence began. Thus it’s worthy of study to any historian, professional or amateur.
National Park Service's Website on Fort Sumpter

Labels:

Tuesday, May 18, 2010

Antietam National Battlefield -- Hiking Trail #2

Union Advance Trail - Attack and Defense of the Burnside Bridge


Antietam National Battlefield established this hiking trail for those visitors wishing to explore the terrain around Burnside Bridge. The trail covers the ground that the soldiers of the Union 9th Corps covered as they tried to capture the bridge. Capturing the bridge was a key step to the 9th Corps attack on the Confederate right. The Confederate positions are also examined at the trail's start.

The auto tour, of course presents an overview of the battle, but among all the tour stops on the auto tour, it is stops 9 and 10 that are most incomplete without exiting the car and walking around. Indeed, Burnside Bridge, one of the most iconic battlefield landmarks is not visible from the parking area of tour stop 9!

Civil War Traveler offers a free downloadable podcast, and the National Park Service sells a brochure with a trail map. The trail map is also available for download.


Podcast

http://www.civilwartraveler.com/audio/index.html

Map

http://www.nps.gov/anti/planyourvisit/hiking.htm

It should be noted that there are slight differences between the tour presented in the official National Park tour book and the podcast. In the book, Tour Stop 1 is on the other side of the bridge. It's officially marked with a post with a "1". The podcast on the other hand, makes the patio near the parking area the first stop, and makes the bridge itself the second stop. Tour Stop 1 in the book is Tour Stop 3 in the podcast. The tour thus continues with a "two stop" differential in the two tours. I'm going by the NPS tour markers, and I've added "A" and "B" at the beginning for the patio and bridge. The tour route is identical for both podcasts.

The trail spends most of its course following the ground involved during the Union attacks. Perhaps somewhat irritatingly the trail does not flow in chronological order. Rather, it takes us to the points involved in the first attack, then fourth, then second, and then third attack, before arriving back at the bridge.

The trail is a mile long, and generally easy, except for two hills. Wear good shoes, use a hiking staff, and watch the groundhog holes and poison ivy!


Trailhead Start

Hikers leave their car at the parking area, find the stone wall, and step onto the patio.

A- Confederate Patio

The patio provides a commanding view of the bridge below. The Confederates posted here, though few in numbers owned a clear terrain advantage. Not only did they have the high ground, but they also had tree cover, and ready-made rifle pits. In fact, these rifle pits still exist today. The pits were created years before the battle by the stones used to build the bridge. Little did the engineers and bridge builders know that in quarrying the stone to build the bridge, they’d be assisting Confederate troops trying to defend it! Walk up to the railing or wall and observe the rifle pits below.

All these advantages would prove necessary to the Confederates, because theirs was a formidable task. With the heavy fighting occurring on the northern end of the battlefield (The Cornfield, The Sunken Road), Confederate General Robert E. Lee had stripped away many of the solders from this end of his battle line, his right flank, to shore up his overwhelmed left flank. Only a skeletal force of brave Rebels stood between the Union 9th Corps, the town of Sharpsburg, and Potomac River fords, the capture of which would have surely spelled the end of Lee’s Army of Northern Virginia, and the Civil War.

Confederate Chain of Command
Confederate General James Longstreet was theoretically in charge of the right half of Lee’s line, but his influence on the events surrounding Burnside Bridge was small. Most of his command was in the northern part of the battlefield, assisting General Thomas “Stonewall” Jackson’s half of the army. (Indeed, Longstreet’s and Jackson’s divisions were so overlapped, that figuring out whose division was occupying what ground is one of the more daunting challenges of touring this particular battlefield).

Only one of Longstreet’s divisions, under Gen. David R Jones was protecting the southern part of the town of Sharpsburg – the only division facing Burnside. To guard against the 9th Corps’ 12,000 federals, Jones only had 3,300 men in his lines.

Only one of Jones’ five small brigades was posted along the bluffs here along the creek. It was under the command of Gen. Robert Toombs. Toombs posted the 2nd Georgia on the left of this point, and the 20th Georgia on the right. The 50th Georgia was posted further to the south, at the Confederate’s Achilles’ Heel – Snavely Ford. Snavely Ford was an alternate crossing of Antietam Creek, and it was impossible for the Confederates to heavily defend both, they were so far away from each other. This is why Jones only posted one brigade to contest the bridge – the minute the Union side learned of the ford, the Bridge would become indefensible. Jones’s men would be needed in the later fight closer to Sharpsburg.

Toombs’ men were strung out below the present-day patio, snug in their rifle pits, with a commanding view of the Bridge, and any ground nearby.

The hiker follows the asphalt trail down to the bridge, and crosses over to the east or Union side. In so doing, he traverses the no-man’s land between the grounds occupied by the two armies.


B – Burnside Bridge

Here at the Union side of Burnside Bridge, the terrain advantage enjoyed by the Confederates becomes even more obvious. The patio and the bluffs nearby seem to frown down on where the Union soldiers needed to be to gain the bridge.

On the near corner (northeast) of the Burnside Bridge is a large sycamore tree. This tree is special, as it is a “witness tree”. The tree is more then 150 years old, and was here during the battle. Union soldiers ran, fought, and died under the boughs of this very tree. The tree was smaller then, but it was there.


One attack, two attack, three attack ... four ?
Exhibit tables on the Union side of the bridge display the series of failed attacks that Union forces launched upon the bridge.
1) Cook’s brigade was to hit the bridge from the right, while the 11th CT distracted from the left.
2) Nagle’s brigade then charged along the roadway leading up to the roadway, suffering disastrous casualties before it made it to the bridge
3) The 51st PA and 51st NY then attacked the bridge simultaneously and carried it.
Note that attack 1) was made up of two columns. Both columns were beaten back, and one of them got pathetically lost. For this reason, some historians count “Attack #1” as two attacks, because that’s what they deteriorated into. If we split the first attack into two parts, then there were a grand total of four attacks on Burnside Bridge, the last one being successful.

Hike along the bank of Antietam Creek along towards the north. Follow the trail in it’s right hand turn just before Stop 1.

Stop 1 – Union Plan and Organization

The Union plan to size the bridge involved feint, diversion, and flanking. It also involved carelessness. Burnside had actually been hoping he’d be able to take the bridge without a fight. Official word from US Army engineers was that that a ford existed a half mile south of the bridge. One of the four 9th Corps divisions under Gen. Isaac Peace Rodman would find it, seize it, use it, and flank the Confederate positions. Thus the Confederates would be forced to abandon the bridge defense.

The alleged ford had a serious drawback-it didn’t really exist. The engineers had either misjudged the steepness of the banks at this half-mile point, or had confused this ‘ford’ with Snavely’s Ford, which was actually two miles south of the bridge. Both Rodman and Burnside seem to have neglected to conduct any reconnaissance in this department.

The attacks on the bridge were meant to be diversionary in nature. If things had gone as they were supposed too, Toombs’ Confederates would have been distracted by the federals to their front, that they’d not notice Rodman flanking. Rodman of course, was not going to be in position for a good long while.

Cook’s Blunder
Lack of reconnaissance seemed to trickle down through the 9th Corps on this day. Col. George Crook did not note the approaches to the bridge, despite the fact that his brigade had been camped in the area for two days. Thus, when his brigade stepped to the attack, they became disoriented in a strip of woods, and reached Antietam Creek at this point, too far north to be any direct threat to the bridge, and much too far away to give any support or protection to the hapless 11th Connecticut. Crooks men hit the dirt, and exchanged volleys with the men of the 20th Georgia, strung out in a long line on the western side of the Antietam.

The trail continues to the east, up the hill, and then cuts south along the ridgeline and into the woods.

Stop 2 - Burnside Bridge Overlook


The Attack of the 51sts
This trail stop is in the woods, with a vista cut out, presenting a photogenic view of Burnside Bridge. This is the same view that the men of the 51st Pennsylvania and 51st New York of General Edward G. Ferrero’s brigade had as they stormed the span. This attack was the last and successful one, and this view gives a fairly good idea of why this attack worked when the others didn’t. Ferrero’s men were safe from enemy fire behind this ridge. They were only exposed a short time to the Confederate rifles as they advanced. The two regiments only had a short distance to hustle to make it to the bridge.

The reverse side of the slope was, of course where Ferrero’s men formed up to prepare for their attack. General Ferrero had been a dance instructor before the war, and he was not a favorite amongst his men. Indeed, the men of 51st PA were irritated with him in that their whiskey ration had been taken away as a disciplinary measure. When Ferrero tried to pep talk his two 51sts, one of his Pennsylvanians asked if they’d get their whiskey back. Ferrero promised to make matters right, just before the Keystone and Empire Staters charged the bridge.

The trail continues south through uneven terrain to the 11th Connecticut Monument


Stop 3 – 11th Connecticut Monument


The 11th Connecticut was had never been major battle before. These Nutmeg Statesmen were under the command of the brilliant 26-year-old Col. Henry Kingsbury, who had graduated 4th in his class at West Point in 1861 (a good deal higher then the last in that class, George Armstrong Custer).

Nation Divided, Family Divided
Like many West Point graduates, he knew many men who were serving with the Confederacy. In fact, two of his brothers in law were wearing Confederate gray. Gen. Simon Bolivar Buckner, a general in Tennessee, had married Kingsbury’s older sister. In addition, Kingsbury’s wife, Eva had a sister named Rebecca. Rebecca was married to Confederate General David R Jones … the very same David R. Jones that was the division commander of the Confederates on this sector of the battlefield. Kingsbury’s men would be shooting, and be shot by, the men under his brother in law’s command. Sadly, such horrifying ironies were not uncommon in the Civil War.

Abandoned by a Blunder
The 11th was supposed to charge the bridge from this spot while an entire brigade under Col George Crook supported them. As we well know, Crook’s brigade got hopelessly lost and provided no support at all, leaving the doomed Connecticut men to the guns of Toombs’ Georgians.

The 11th tried to fight it out as best they could. Capt. J.D. Griswold led his company to try to splash their way across the creek – but was gunned down as he hit the opposite bank. The rest of the 11th gamely tried to fire back at the 2nd Georgia, but the Peach Stators were well concealed and under cover, giving the Federals very little to aim at. The men from the 11th however fell left and right, out in the open in this close-range fight.

Col. Kingsbury took a bullet to the heel, another shot to the leg. As his men helped him back to the rear, he was shot in the shoulder, and finally in the abdomen. He would die within a day. He’d never meet his son, Henry Jr., who was born in December.

Gen David R. Jones was distraught to learn that not only was his brother-in-law dead, but also had met his fate under the guns of Jones’ men. Jones never got over this shock, dying of a heart attack 4 months after Antietam.

The 11th Connecticut lost a third of their men in this failed attack on the bridge. Bloodied and leaderless, they fell back to the safety of the woods.

From here, the trail leads down to the opening in the fence line. The hiker will bear in mind that at the point in which the timber breaks, Confederate sharpshooters had a perfect shot at any solder on the clear ground. The trail follows the footsteps of both the 11th CT and the Union soldiers of Nagle’s brigade.


Stop 4 – Fence Opening

This venerated ground was fought over twice. Here the hiker stands on the ground upon which both the men of Kingsbury’s 11th CT fought and died, and later Nagle’s brigade made their embarrassing contribution.

Following the failures of Crook and Kingsbury’s 11th Connecticut, Burnside ordered General James Nagle to lead his brigade in the next attack.

Nagle’s method was straightforward. Two of his regiments, the 2nd Maryland and the 6th New Hampshire, passed through this fence opening and down the road towards the bridge. Nagle’s other two regiments, the 48th Pennsylvania and 9th New Hampshire, would try –ineffectually – to provide covering fire from the tree line. The simple fact was at that range, it was impossible to locate Confederate targets to shoot at, and so the Pennsylvanians and New Hampshire men posed no threat to the Georgians.

A Road of Slaughter
When the Marylanders and men of the 6th New Hampshire charged down the road with fixed bayonets, they were at a range of about 40 yards – no marksmanship challenge at all- from the men of the 2nd Georgia. Toombs’ men could scarcely believe their luck. This would be too easy.


Muskets barked at an increased tempo as the Peach Stators intensified their fire, and Union soldiers fell at almost every shot. Marylanders collapsed in heaps, tripping their healthy comrades, and Granite Stators dropped to the left and the right. Nagle’s ill-conceived attack was a bloody fiasco, and the two regiments lost all cohesion, broke off the attack and fled in great disorder from this cursed road. They did not stop until they reached the safety of the woods.

The trail concludes by following the old roadbed of the Rohrbach Road. The road follows in the footsteps of the ill-fated 2nd MD and 6th NH until about the halfway point. By then, the hiker has made it further then the luckiest Union soldier in Nagle’s brigade had.


Stop 5 -- Burnside Bridge Again

Cook’s brigade had gotten lost, and had left the 11th CT to their fate. Nagle was repulsed with heavy casualties. Burnside made one last attempt. The aforementioned (at stop 2) 51st PA and 51st NY regiments were to charge the bridge. After promising the Pennsylvanians their whiskey, Nagle ordered them to the attack.

A Foothold at Last
With a shout the two 51sts dashed down the hill behind the bridge and charged the two flanks of the bridge. The Pennsylvanians fell in behind the stonewall on the right, and the Empire Stators lined up by the fence to the left. Resting their muskets on stones and fence rails, they took their revenge on the Confederate sharpshooters who had so tormented the 9th Corps for the last three hours. Volleys blazed across the Antietam Creek into the positions of the 2nd and 20th Georgia.

The weight of the Union firepower finally began to tell. The Confederate fire slackened as Georgians fell dead and wounded. Ammunition started giving out as well, and living Confederates scavenged ammo from the dead and wounded.

Across the Bridge!

The men of the two 51sts sensed that success was near, and simultaneously and spontaneously left their cover and charged across the bridge, the stars and stripes and regimental flags leading the way. For Toombs’ men, time was running out.

The coup-de-grace for the Confederates was when they received very bad news from the south. The Union division of Isaac Rodman had crossed the creek to the south at Snavely’s Ford. This made any further resistance pointless, and the survivors of the 2nd and 20th Georgia were ordered to pull back, lest they be pinned by Rodman’s men coming up from their left while Fererro crossed the bridge to their front.

The men of these two regiments, not more then 500 in number, had crippled the entire 9th Corps. 12,500 men, for a full 3 hours; a stand had been nothing short of heroic.

One Confederate officer would not cede defeat, and chose to die a hero. Lt. Col. William Holmes of the 2nd Georgia ran down to the bridge, waving his sword in defiance. Victorious Federal soldiers shot him down.

The precious Rohrbach Bridge, forever after known as Burnside’s Bridge, was now in Union hands. 500 Northern men had fallen in their oft-ill conceived attempts to take it. The skeletal force of defending Southerners had only lost 160 men.

The entire balance of the 9th Corps would traverse it to take positions to attack the Confederate lines. 8,000 soldiers plus supply wagons, ammunition wagons and ambulances would trudge and rumble across it, as Confederate General Robert E. Lee’s right flank lay exposed to take Burnside’s killing blow.

What happened next is a tale that is told on Trail # 3, the Final Attack.

Labels: , ,

Wednesday, April 28, 2010

Antietam National Battlefield - Hiking Trail #1

Hiking Trail - The Cornfield

Antietam National Battlefield has established this hiking trail for the sake of visitors who wish to explore the terrain around "The Bloody Cornfield" in more detail then that provided by the driving tour.

It is of course, possible to enjoy the battlefield tour without going on the hike, but history buffs will be rewarded by the trail that follows in the footsteps of Union soldiers as they advanced into battle in the pre-dawn light of September 17th 1862, and into the inferno of combat in the corn. Indeed, anyone who enjoys a good hike will be glad they went.

The National Park Service sells a tour map and pamphlet at the Visitor Center for a mere $2.00.

The map is also downloadable from the NPS site here.

http://www.nps.gov/anti/planyourvisit/hiking.htm

In addition, the website CivilWarTraveller.com provides a downloadable podcast for free. The podcast is narrated to match the tour stops.

http://www.civilwartraveler.com/audio/index.html


The tour begins at driving Tour Stop #2 (The Poffenberger Farm) The trail is 1.6 miles long, and takes between an hour and an hour and a half. Be careful of the groundhog holes and poison ivy.


Stop 1 – Parking area and Auto Tour Stop 2
(Fence across the street from the parking lot and Clara Barton monument)

Restless Night
This spot was the edge of the Union encampment on the night of Sept 16th -17th. The camps of General Joseph Hooker's 1st Corps were spread out to the north on the Poffenberger's fields. The Confederate troops under Thomas J "Stonewall" Jackson were mostly posted in the area of cornfield of the Miller farm, a half mile south. Cannons backed them up on the mild plateau near the Dunker Church.

Everyone slept knowing a fight was going to happen in the morning. Many were surprised that it had not happened the day before. On the 16th, in broad daylight, the Union 1st and 12th Corps splashed across the Antietam Creek to reach this staging area. Only a mild skirmish had occurred. And so the two armies bedded down for the night of the 16th, knowing that many of their friends would be dead within a day.

Hooker's orders from General McClellan (Commander of the Union Army of the Potomac) were to move out at first light and attack the Confederate positions. The responsibility for opening the battle would be his. Among his several vices, Hooker was given to boast, but he didn't need to stretch the truth on the night of the 16th. He commented to the several reporters that were constantly following him around, that "Tomorrow we will fight the battle that would decide the fate of the Republic".

General Hooker was an aggressive fighter, and was eager to carry out his orders. He had his soldiers on their feet at 5:00 am.

Directly south of this spot was a small woodlot known as the North Woods. An astute visitor will notice that there are many short, young trees in the immediate area. This is because the NPS is replanting the North Woods in an effort to restore the battleground to its Sept 1862 appearance.

Hiking south from Stop 1 to Stop 2 follows in the footsteps of Union soldiers as they left their camps, and crossed the North Woods.


Stop 2 – Out the Woods and Into the Fire

Battle Lines
As the soldiers woke up and formed up their battle lines, sporadic gunshots were heard. That was the skirmishers on both sides probing their opposing lines. The Union battle line of the 1st Corps was extensive, over a half mile long. One division of Union troops under Gen. Abner Doubleday stepped out of the North Woods at this point. Another division under Gen. James Ricketts formed up on the left. Behind, still back at the farm was the division of General George Gordon Meade.

Incoming!
The minute Doubleday’s men left the safety of the timberline, they were under attack by Confederate artillery. On their right flank, across the Hagerstown Pike was a ridge known as Nicodemus Heights. It is all private property today, and the heights are tree covered now. In 1862, the ground was open – and occupied by Confederate Major John Pelham’s dozen or so cannons. That number wasn’t enough to thwart the Union attack, but their advantageous position – combined with Pelham’s natural pluck and tenacity meant that these guns would punch above their weight.


Pelham’s cannons were aimed perfectly – the third shot landed in the middle of the 6th Wisconsin, killing 2 soldiers and wounding 11. Cannons from both sides joined in on the fight. More Confederate cannon engaged – those under Col. Stephen D. Lee (no close relation to the Robert E. Lee) deployed on the plateau near the Dunker Church. No Union soldier could doubt that they were in harms way. Far across the Antietam Creek, long range Union canons attempted to suppress the Confederate guns.

The Sparkling Corn
Hooker, Doubleday, and other Union officers had a much better view then their soldiers, (who had the same view the average hiker has) – they were on their horses, and their point of view was nine feet in the air. From there, they could see a foreboding sight. A half-mile away, the September sunlight caused a glistening, sparkling effect in the Miller cornfield. Thousands of Confederate soldiers, their bayonets and polished gun barrels catching the rising sun, were waiting for them.

Hiking from Stop 2 to Stop 3 traverses the Union line of battle. The hiker moves west, along what were once the ranks of Doubleday’s and then Ricketts’ men. After taking a sharp right hand turn, the hiker moves south, following in the footsteps of Ricketts’ division.


Stop 3 – Tricky Terrain an A Complicated Advance

Artillery Reaping
Immediately to the right is a subtle roll in the ground. As Doubleday and Ricketts advanced, Hooker noticed that the cornfield in front of him was filled with Confederates. Altering his battle plan slightly, he halted his infantry, and ordered 2 batteries of cannons (12 guns) to park hub-to-hub on that high ground, and destroy the Miller Cornfield and the Confederates therein. The cannons blazed away at point-blank range, firing shrapnel or ‘case shot’, an anti-personnel weapon. It was essentially a bomb fired from a cannon that was timed with a fuse to explode at a certain range. When the bomb exploded, bullets that were packed inside as well as fragments of shell scattered everywhere, killing, crippling and maiming anyone nearby. Hooker’s gunners had cut their fuses down to one-and-a-half seconds.


Tough Going
Moving a line of men a mile or so south would seem like a simple enough task. Battles however are nothing if not chaotic and unpredictable, and plans are often wrecked very soon after the first shot is fired. This happened at Antietam. Ricketts’ attack fell victim to every difficulty that could occur to a division. Confederate artillery killed and wounded soldiers as they advanced. The presence of the Union cannons delayed Doubleday, but didn’t delay Ricketts, chopping up the Federal attack. The hills and rolls in the terrain- to say nothing of the battle smoke - made it difficult to keep track of nearby friendly units.

Duryea Alone
One of Ricketts’ three brigade commanders was wounded and had to leave the field. A second brigade commander panicked at the shellfire and ran away, abandoning his troops. Only the third brigade, under General Abram Duryea made initial contact with the Confederates on schedule. Although the other two brigades would recover from their difficulties and join the fight, Duryea would begin this fight alone, and loose almost half his 1,000 men in just 30 minutes of combat.

Hiking from Stop 3 to Stop 4 continues in the footsteps of Ricketts’ men, to the point just before they entered the “Bloody Cornfield”.


Stop 4 - Corner of Death at Antietam

The worm fence marks the boundary of the Cornfield. Ricketts Union division, one brigade at a time, made deadly contact with Stonewall Jackson’s defending Confederates, pushing through the corn. Simultaneously, Doubleday’s men engaged to the west. As the battle progressed, the Cornfield would change hands several times. Troops who arrived later in the battle noticed that the horrible carnage followed a pattern- the worst casualties would always be at the edge of a landscape feature such as a woodlot, a roadway and this cornfield. Many of Ricketts men would meet their deaths at the southern end of this cornfield.


Counterattacking Confederate men would die in large numbers at this (northern) edge of the cornfield.

Hiking from Stop 4 to Stop 5 again traverses the Union line of battle, walking back along Ricketts’ lines and reaching Doubleday’s lines. Walk west along the northern border of the Cornfield to Stop 5


Stop 5 – The Most Sacred Ground – The Cornfield

The hiker is about to enter the David R. Miller Cornfield. This is the some of the most sacred and hallowed ground in the United States. Thousands of Union and Confederate soldiers died in these 30 acres of maize, as it changed hands time and again.

The reason why the cornfield was so dangerous is simple. Soldiers waiting on the other side of the cornfield couldn’t get clean shots at the men coming through the corn, and thus held their fire until the enemy reached the edge. When the soldiers finally opened fire, they did so at almost point-blank range. When Union troops first reached this point, they plunged into the corn, and the battle was joined at the southern edge. Later, when Confederate troops counterattacked, they themselves met a wall of lead from Union reinforcements at this the northern edge.

Union General John Gibbon commanded the first brigade of Doubleday’s men to enter the corn. Because of their bravery at the battles of Second Manassas and South Mountain, they had been dubbed The Iron Brigade. These Midwestern boys, men from Wisconsin and Indiana, took pride in both their nickname, and their army designation – the 1st Brigade of the 1st Division of the 1st Corps.

As the Midwesterners reached this point, they could see the dead and dying Confederates laying in the wrecked cornfield, the victims of the point-blank bombardment ordered by General Hooker. The Confederate battle line had by now abandoned the badly damaged cornfield and had regrouped on the other side of it.


Hiking from Stop 5 to Stop 6 follows in the footsteps of the Iron Brigade as they marched through the cornfield.


Stop 6 – Georgian Defense and Texas Counterattack

Douglas vs. The Iron Brigade
Col. Marcellus Douglas commanded the Confederate brigade in this area. His men bore the brunt of the artillery bombardment, and now braced for the Iron Brigade’s attack. The gray Georgia Monument to the left honors Douglas’s Georgians. As Gibbon’s Iron Brigade reached this southern edge of the cornfield, they receive their first volley at close range. Pausing at the edge of the corn, the Midwesterners fired back and the battle of Antietam was on in earnest. Hundreds of men dropped from the ranks, some killed on the spot, some wounded, but able get themselves to the rear, and others wounded so badly they could do nothing but lay there and plead for help.

Confederate Collapse
Douglas’s Confederates got the worst of this fight, having already been shocked and bloodied by the artillery. Another Confederate brigade arrived to support them, these men Louisianans under General Harry Hays. They filed in next to the Georgians, and were demolished by Ricketts men, who were, as we know covering Doubleday’s left. In a short time, both Douglas’ and Hays’ commands had lost more then half their men, and were retreating. Douglas himself was killed by an artillery shell that blew him into the air.

Gibbon’s cheering men of iron charged beyond the cornfield, followed by their reinforcements. The men of Doubleday’s division then caught a third Confederate brigade under Gen. William Starke in a murderous crossfire. After an intense firefight, during which at one point the two forces blasted away at each other from opposite sides of the Hagerstown Pike, Starke’s men were also put to flight. It was only 7:00 in the morning and already the Confederate battle line was breaking into pieces! Could anything stop the 1st Corps?

Lone Star
The rose colored monument directly across Cornfield Avenue holds the answer. It is the Texas Monument, and represents the very last reinforcements that Stonewall Jackson had available to him. General John Bell Hood’s Texans were held in reserve about a half mile away behind the Dunker Church (visible from this point between the trees). These men were all Jackson had to depend on, but they were some of the best.

The Texas Brigade had not only Texans but also Alabamians and Mississippians in their ranks. These men from the Confederate West had a reputation for being the roughest and toughest brawlers in the Confederate Army, and they took pride in living up to it. Being held in reserve, they had just started their cooking fires and were about to chow down on breakfast. Since they had been on the march for most of the campaign, it would have been their first hot-cooked meal in three days.

Before a single morsel could be eaten, the order to fall in and march to the front was given. The men of the Texas Brigade did not like this. Not one bit.

Lining up by the Dunker Church (and present day Visitor Center), the enraged Texans let out the Rebel Yell and charged into the Yankees who had dared to interrupt their meal. By now Doubleday’s men were fought out, low on ammunition, and fell back through the Cornfield, with the angry Texans right behind them.


The Texans themselves would then be crushed by Gen George Meade’s division of Union infantry and by the cannons that Hooker had deployed on the open ground to the north. The 1st Texas regiment would loose 82% of its men. The arrival of the Union 12th Corps from the east compelled Hood’s survivors to abandon this horrible Cornfield.

Hiking from Stop 6 to Stop 7 follows in the footsteps of Hood’s charging Confederates north along the Hagerstown Road.


Stop 7 – The Bugler and the General

Across the Hagerstown Pike are two cannons, representing a battery (six guns) of Union artillery. These guns were moved forward during the initial Union advance and fired on Douglas’ Confederates as the fight got underway. Perhaps it was even a shell from one of these guns that killed Col. Douglas. Such proximity to fighting infantry was incredibly dangerous, and this battery (Battery B, 4th US Artillery) took the casualties to prove it, almost 50 % including its commander.

When Hood’s Texans counterattacked, an already dangerous position became practically suicidal. There was no time to limber up the guns and retreat – the artillerymen had to either fight and win, or be overrun.

The soldiers manning the guns had just the ammunition for this sort of work – canister. Another anti-personnel weapon, canister consisted of a thin metal can packed with iron balls, like a very large load of buckshot. It could be used only at very short range. When a canister round was fired, the tin can flew apart immediately upon leaving the barrel sending the iron balls scattering everywhere. It turned the cannon into a huge shotgun. The cannons could also be loaded with two or even three rounds of canister for when things got desperate.

When Hood’s men counterattacked, things got desperate.

The effect of a blast of canister upon a line of infantry was possibly the most grisly sight in a war filled with grisly sights. The iron balls shredded human flesh, and ripped men apart where they stood. Arms and heads were torn off and thrown hither and yon. Such effects could happen from one cannon firing one load of this awful weapon. There were six cannons here, the surviving artillerymen fighting for their lives. Each cannon was loaded with at least double canister. Dozens of men would be killed and wounded in a single blast.


With half the men of the battery killed and wounded, and the battery in danger of being overrun, all hands were needed to work the guns. The battery’s bugle boy, 15-year-old Johnny Cook jumped to the task and helped load and fire the pieces. Before the war, Cook had been a Cincinnati paperboy. Before Antietam, he had been a bugler, one of the countless lads who joined up and usually served in non-combat roles, despite being very much in harms way. After Antietam he was a hero, awarded the Medal of Honor for his extreme courage in the face of mortal danger.

General John Gibbon needed these cannons’ firepower to protect his Iron Brigade. Having had training in artillery, he dismounted from his horse, loaded one of the pieces, and sighted it himself to make sure the blast was accurate.

The Confederates charged these cannons, but did not reach them. They were blasted to pieces within a few yards of the smoking muzzles of the guns. When the Union 12th Corps arrived on the battlefield, and pushed off the remaining Confederates, the combat mercifully died down in this, the bloodiest sector of the bloodiest day of the war.

Hiking from Stop 7 to Stop 8 follows the Hagerstown Road back towards Tour Stop 1. These would be the footsteps of a wounded Union soldier, limping back towards the Poffenberger Farm and medical aid.


Stop 8 -- The Miller Farm

The Northern side of the Miller Cornfield marks the furthest advance of Hood’s counterattack. Here’s were the Texans were brutally smashed by General Meade’s Pennsylvanians.

The battle of Antietam continued to rage in other sectors of the field – The West Woods, The Sunken Road, Burnside’s Bridge, and the Otto Farm would all see their share of horrors on that day, but perhaps only the Sunken Road would present a sight as grotesque as the Miller’s Cornfield.

City of Blue
After the battle, General McClellan declined to aggressively pursue Lee’s army. The Union Army stayed put in the fields around Sharpsburg. For two months, the 1200 residents of Sharpsburg reluctantly played host to 80,000 soldiers. From a certain way of looking at things, Sharpsburg became the tenth largest city in America, surpassing Buffalo, NY in population for that period of time!

80,000 soldiers had their needs, and that included wood for cooking and campfires. Entire woodlots went up in flames day by day, a tree at a time. The wooden fences has also mostly been knocked down. Even the ones that weren’t in the thick of the fighting were often knocked down simply because they were in the way. Farmers, of course build fences for a reason, and the end of the fences meant that livestock could start roaming free. That was fine by the soldiers. Although the soldiers were forbidden from stealing from the farmers, a chicken or swine that wandered into a camp full of hungry troops would probably not be seen again. Farmers like David Miller naturally resented the soldier’s continued presence, and described them as “two-legged-locusts”.

An Army of Germs was carried with the Army of the Potomac. Disease spread rapidly. Most of the armies on both sides were made up of country boys, and the army was the first time they were crowded together with city boys. Men from rural areas had much less immunity and were far more susceptible to contagious illness. Throughout the Civil War, sickness would kill 2 soldiers for every one who died in battle. Army camps were often lacking in even the most basic sanitation. The presence of the dirty army was a health threat to the residents of the area, and many got sick. David Miller’s brother Daniel became ill and died shortly after the battle.

The Miller House on top of the hill on the hiker’s side of the street was a witness to the battle. So too was the barn on the opposite side of the street. The other buildings were built later.

The hiking trail concludes by winding its way up to the north and northeast. It cuts through the North Woods, allowing the hiker to observe the growing young trees. The trail ends at Tour Stop 1.

Conclusion
The trail has cut through the scene of some of the worst fighting in US history. No man who fought through it and survived it would ever forget it. The Civil War had many battles, and many of those battles had landscapes that were named for the savagery of their fighting. Gettysburg had the Devil’s Den, The Wheatfield, The Peach Orchard Little Round Top, the Railway Cut, and The Angle. Fredericksburg had Marye’s Heights. Spotsylvania had The Bloody Angle. Shiloh had The Bloody Pond.

The Iron Brigade’s Major Rufus Dawes, a combat veteran of almost every battle fought by the Army of The Potomac, was traumatized by this combat more then any battle previous or following. It “surpassed anything, on any other battlefield of my observation …” The sanguine 1st Corps commander, Joseph Hooker agreed. “It was never my fortune to witness a more bloody, dismal battlefield.”

The Antietam National Battlefield has several other hiking trials, including the Sunken Road, Burnside’s Bridge, and The Final Attack trail

Labels: , ,

Saturday, April 24, 2010

Antietam National Battlefield -- Auto Tour


Auto Tour

Visitor Center
The visitor center is the obvious place to begin. It’s an ideal spot to get oriented to the battlefield. A video narrated by James Earl Jones details troop movements and is shown daily. Downstairs are four huge battle paintings by Antietam veteran-turned-artist James Hope.
Since the visitor center is located on a mild plateau, its observation deck provides gorgeous panoramic views of more then half the battlefield.

Eastern National’s gift shop sells everything from Antietam coffee mugs to t-shirts, to bottled water. The all-important rest rooms are there too.

Outside of the building, visitors will find a black bell. This is the ships bell for the USS Antietam, a WWII aircraft carrier. That the Navy named (and continues to name) vessels after great battles like Antietam is a testament to the place this battle has in US history.


Along the pathway that leads down to the Hagerstown Road are several cannon. They are there for two reasons. First they remind the visitor that this mildly elevated ground was a Confederate artillery emplacement. Second, the cannon of differing designs and types represent the variety of tube artillery that was all about the battlefield. Exhibit plaques and tables describe the abilities of each type of artillery.

Next to the visitor center, the impressively tall New York State monument honors all the Empire Staters who fought for the North at Antietam.


Tour Stop #1 – Dunker Church


The Dunkers were a pacifist sect of Christians. They were called Dunkers because they baptized new members by total immersion. Dunkers were plain and peaceful folk. The parishioners wary of the sin of pride, the church boasted neither a steeple nor stained glass. It was a cruel irony that their simple church would be used as a focal point to guide Union attacks. It suffered heavily from battle damage during the fight. The Confederates used the structure as a temporary aid station for their wounded.

Across the street from the church is the beautiful, gazebo like Maryland Monument. Maryland was boarder state whose citizens had both northern and southern sympathies. It was torn in two by the War. 115,000 Old Line Staters fought in the Civil War. 85,000 wore blue. 30,000 wore gray. The Maryland Monument is the only monument on the field to honor men who fought on both sides of the conflict.


Tour Stop #2- J. Poffenberger Farm

Union Springboard
One of the reasons for the heavy casualties at Antietam was that the battle began early in the morning, and the two armies had spent the previous night within sight of each other. And so, they wasted no time getting down to the deadly work. This farm was the stepping off point for the Union 1st Corps, under General Joseph Hooker. Hooker’s Corps was one of 4 Union Corps to attack the Confederate line during the battle. The men camped here the night before, and at first light moved out to the south, towards the Dunker Church. The Union attacks were piecemeal and confused. Each individual unit and brigade would make progress, then be stymied, and give ground to a Confederate counterattack.

Combat surged to and fro over the Miller Cornfield south of here (we’ll see more of it at tour stop # 4). The carnage was so appalling that one union colonel abandoned his brigade in fear and ran for the rear. Other Union soldiers broke and ran. Veteran troops would flee past this place babbling in terror.

The Angel of the Battlefield
The waves of wounded staggering back needed a hero. They received a heroine. A 40year old civilian woman named Clarissa “Clara” Harlowe Barton came onto the battlefield. She had rare permission from the War Department to distribute medical supplies directly to the troops at the front. When the Union head surgeon for the 1st Corps saw her ride up with her wagons of supplies, he threw up his hands and said “God has not abandoned us!”

As unofficial nurse, Clara Barton was never afraid to get her hands dirty. Her tireless work on behalf of wounded soldiers earned her the nickname “Angel Of The Battlefield”. She tended to the injured so close to the front that when she stopped to water one stricken man, a Confederate stray bullet tore through her sleeve and killed her patient.

One of the most beautiful monuments on the field is right next to the parking area. It is the Clara Barton monument, commemorating her efforts of mercy. The whitewashed stone memorial has at its base two bricks taken from her Massachusetts home. They are arranged to form a Red Cross, symbolizing the relief agency that Clara later helped introduce, The American Red Cross.


Four other monuments form a “battle line” along the tour road. These monuments of Union soldiers are for the regiments Pennsylvania Reserve brigade. These Keystone Statesmen went into battle with Hooker’s 1st Corps.

This is also the stepping off point for the National Park Service’s Cornfield Trail.


Tour Stop # 3 – The East Woods

Fallen Union General
On the way to this parking area, the tourist passes an impressive polished monument to Union General Joseph K. Mansfield, commander of Union 12th Corps. From the parking area, a mortuary cannon, a signature of the Antietam Battlefield is visible standing muzzle down in the stone block. Antietam has six of these cannons marking where generals died on the battlefield. Despite the loss of their leader early in the action, the 12th Corps supported the 1st Corps in battle, the second Union Corps to be committed to the fight.


Tour Stop #4 – The Cornfield

Even a novice battlefield visitor can immediately suspect that important – and horrible - things happened here. The concentration of large memorials next to the parking area makes it evident that veteran soldiers wanted to memorialize this place above all others.

David Miller’s cornfield is now simply known as The Bloody Cornfield, and Civil War soldiers did not give out the nickname “Bloody” without good reason.

It was here that the Battle of Antietam began in earnest. Union Soldiers from Tour Stop 2, the Poffenberger Farm (visible in the distance, especially if there are cars parked there) clashed here with Jackson’s waiting Confederates. Union troops gained the upper hand, but were then pushed back by a furious Confederate counterattack under Gen John Bell Hood, which saved the Confederate line. That Confederate counterattack was itself brutally crushed by Union reinforcements and artillery. The Cornfield changed hands too many times to easily count. Every stalk of corn was cut down and it became difficult for incoming soldiers to walk across the field, so thickly strewn were the dead and dying.

“Worm” fences mark the boundaries of Bloody Cornfield. Perhaps surprisingly, it doesn’t always have corn growing in it. The NPS leases the land to local farmers, and like all farmers, they rotate crops.

The large obelisk monument along the Hagerstown Pike is the Indiana Monument. Next to it is the dramatic New Jersey Monument capped by a Union officer with an upraised sword. The stout Massachusetts Monument is across Cornfield Avenue on the opposite corner.

There are only five Confederate monuments in the entire park, and two of them are here, Georgia and Texas. They made up the bulk of soldiers who blunted the Union attacks.

Be sure to investigate the exhibit tables. Here at The Cornfield, the exhibit includes two charts representing the Union and Confederate armies. Note how the Union section has many more soldiers then the Confederate section does. Note further how the chart “tracks” the progress of the battle, by coloring red the casualties that were suffered in either side


Tour Stop # 5 – The West Woods
Flanked and Routed
This clearing in the large woodlot north of the Hagerstown Pike marks the farthest penetration of the Union attacks. The Union 2nd Corps under Edwin V Sumner now stepped up to support the fought-out 1st and 12th Corps. The soldiers in this corps, the third to attack for the day, suspected that the battle was going their way, and that they would administer the deathblow to Lee’s Army.

Sumner’s 2nd Corps was divided into three divisions. The first division under Gen. John Sedgewick came here into the West Woods. Stacked three brigades deep, they engaged a few remnants of the Confederate line to their front … and immediately received a horrifying surprise.

Two fresh Confederate divisions roared in from the south, near the Dunker Church and attacked the blue lines in their vulnerable left flanks. It was a fortunate accident for the Confederate reinforcements, and the positioning could not have been better for them if they had planned it.

All three brigades of this division were hit simultaneously, and had no time to turn to fight their new attackers. Sedgewick’s division, which should have had a strong influence on the course of the battle, was squandered. Half of the men were killed and wounded and the rest ran for their lives to the north. The rout was so complete that these survivors would contribute nothing further to the battle of Antietam.

The gigantic Philadelphia Brigade monument dominates the park, and this obelisk is the tallest monument at Antietam. Along the way in, the visitor passes by a second mortuary cannon, this one to Confederate General Starke. Exhibits here illustrate the flanking of Sedgewick’s division and, like the exhibit at The Cornfield, tally up the Union and Confederate losses for this phase of the fighting.


Tour Stop # 6 – The Mumma Farm

This stop is usually of limited interest to the battlefield visitor. This is the Mumma Farm, which has the grim distinction of being the only civilian property deliberately destroyed by either army during the battle. The Confederate soldiers burned the buildings to prevent its use by Union sharpshooters. It saw no active fighting, but many a Union and Confederate soldier, while documenting their experiences on the battlefield remembered the burning Mumma Farm.


Tour Stop #7 – Union Advance

This is another tour stop that’s a bit scanty on information. The view from the parking area is that of the Roulette farm, the avenue of attack for the remainder of the Union 2nd Corps. The visitor will remember that the first division of the 2nd Corps (under Sedgwick) was knocked out of action at the West Woods (Tour Stop 5). The other two Union divisions under Generals William French and Isreal Richardson advanced across these fields to strike Confederates under Gen. D.H. Hill at the “Sunken Road”


Tour Stop #8 – The Sunken Road (Bloody Lane)

Point Blank
Before the battle, this country lane was the boundary between the Roulette farm to the east, and Piper farm to the west. Years of use by heavily laden wagons pressed the roadbed to a level below that of the surrounding area. For the Confederates of Gen D.H. Hill’s division, it was a pre-fabricated infantry trench. A thin gray line of Southerners stood there ground here, and waited for the Northern boys under French and Richardson to attack.


The viewer can see the ridge that the Federal soldiers had to crest to attack the road. It’s not even a football field away from the lane. By the time the blue-coated soldiers cleared the ridge and descended towards the rifles of DH Hill’s men, it was death at nearly point blank range.
Soldiers fell left and right as each side sent volleys of rifle fire crashing into each other. Casualties were horrendous, as detailed in both the exhibit table (another one with a chart) and yet another mortuary cannon, this one to Confederate General T.G. Anderson. The lane is fairly lengthy, and contains two parking areas. One is by Anderson’s cannon, site of the attack of French’s division. The other is about a ¼ mile to the right, next to the observation tower. Richardson’s Federals attacked in this area.

Deathtrap
The Southerners had a formidable position, but the Northerners had the superior numbers, and that carried the lane. When one Union regiment found a knoll from where they could rain down rifle fire on the Southern position, the Sunken Road became a deathtrap, and Confederate line collapsed. The Union held the ground, but the two divisions were too fought out to advance any further. Few sights of the Civil War were more gruesome then the Sunken Road filled with Confederate bodies. Unsurprisingly, the Sunken Road forever after bore the name Bloody Lane. Like Miller's cornfield, it had seen more then enough carnage to earn the gory nickname.

The view from the observation tower is as spectacular as one might imagine. Go climb! The Dunker Church, Cornfield, West Woods, Visitor Center and Sunken Road are all visible from the deck. Near the tower is the artistic monument to the Union Irish Brigade, which opened up Richardson’s attack. Richardson has his own monument too, his mortuary cannon, by now a familiar sight on this sanguine battleground.


Tour Stop # 9 – Burnside's Bridge

500 vs 12,500
The 9th Corps, under General Ambrose Burnside, made the fourth major Union attack of the day. To hit the Confederate lines, they had to cross the Antietam creek. To cross the creek, they had to capture the three-arched stone bridge. General Burnside would spend far too much time trying to claim this bridge that would bear his name.


Everything that could possibly go wrong for Burnside did go wrong. Even though only a few hundred Georgians held the Confederate side of the span, three separate Union attacks failed to capture it. One of them even got lost on their way to the bridge. Finally, the fourth attack succeeded – three hours after the bridge was supposed to have been captured Roughly 500 Confederates had paralyzed 12,500 Federals for this long.

The parking area has trails that lead down to the bridge. First, there’s a quick detour exhibiting the Confederate positions from the bluffs overlooking the bridge. On the Union side of the span, more exhibits display the scene from the Northern point of view. Here are the monuments to “The two 51sts”, the 51st Pennsylvania and 51st New York that captured the bridge.
Also near the parking area is the impressive McKinley Monument. One might wonder why a lowly commissary sergeant has a monument of this grandeur dedicated to him, but Sgt. William McKinley was no ordinary sergeant. Rather he had a brilliant and tragic future ahead of him as the 25th President of the United States, and the 3rd to be assassinated.

Exhibit tables are situated on either side of the bridge, and again the tally of casualties increases on both sides.

The Burnside’s Bridge parking lot is also the starting point for two key hiking trails. The Burnside Bridge Trail carries forth to the Union side of the creek, and walks over much of the ground seen by the four Union attacks to storm the bridge. The Final Attack Trail follows in great detail the action after Burnside seized the bridge, and outlines the end of the Battle of Antietam. This brings us to …


Tour Stop #10 – The Final Attack

Last Minute Miracle for the South
This last action tour stop is situated on the last Confederate line of resistance. The parking area has a view of the fields upon which the Union soldiers of the 9th Corps to attack the badly outnumbered Southerners. After seizing the bridge, an operation that took three hours, the 9th Corps squandered another 2 hours getting all 12,000 men across the bridge, and re-supplying the soldiers with ammo. Finally, at around 3:00pm, the massive 9th Corps moved towards where the visitor is parked, intent on capturing Sharpsburg and crushing Lee’s army.

It was a miracle of timing that saved the Confederate army. The last division of Confederates to arrive on the field showed up at 4:00pm, under Confederate General A.P. Hill. These last fresh Southern troops drove straight into the unguarded flanks of the Union 9th Corps knocking them back to the heights by Burnside’s Bridge, and ending the battle in a tactical draw.

The terrain at this tour stop works against the visitor. A viewer at the parking area is only about a half mile from Burnside’s Bridge, but the bridge is hidden by the intervening hills on the Otto Farm making it difficult to appreciate how far (or rather, how short) the Federal units had to march to engage the Confederates here. Part of this reason is that much of the land at this part of the battlefield was not acquired until the early 2000s. Because of this, the Final Attack hiking trail is strongly recommended.

Scattered monuments to the front memorialize the Union regiments that fought here, both along the road and in the undulating fields in front of it. Also along this road are two more mortuary cannons to Union general Rodman and Confederate General Branch. To the viewers rear is the obelisk to the 9th New York regiment, which made the furthest advance during this attack before being compelled to retire by Hill’s counterattack.

The by-now familiar exhibit tables bring the battle to a close, with the final grim tally for the tragic Battle of Antietam: 23,000 soldiers killed wounded and missing, Americans all.


Tour Stop # 11 – Antietam National Cemetery

The battle was over, and very little ground had changed hands at all. Union and Confederate forces had mauled each other into a stalemate. Union general McClellan had almost 25,000 soldiers ready who had not yet fired a shot. Confederate general Lee had fought his last man. But McClellan, badly shaken by the terrible casualties did not finish off his foe.

Two days after the fighting, Lee evacuated the battlefield, and his invasion was over. Although it had been tactical draw, the battle was a strategic victory for the North.

President Abraham Lincoln now had the political credibility to extend the goals of the Northern war effort. The Civil War was no longer going to be a petty feud over states rights and secession, but a noble quest to crush slavery in America. The Emancipation Proclamation, issued a mere five days after the fighting at Antietam, was an important first step. The modest, yet important Union victory at Antietam made that first step possible.

The final stop on the tour invites the tourist to contemplate the human cost of the Battle of Antietam. Most of the casualties, Northerners and Southerners were buried by Union grave details where they fell on the battlefield. And there was a lot of such work to do. More then 2100 Federals and 1500 Confederates were dead, making this one day battle the bloodiest day of violence in United States history. 9500 more Union and 7700 Confederates were wounded. In addition, more then 700 Yankees and 1000 Rebels were listed as “missing”, mostly captured.

The Antietam National Cemetery houses the remains of more then 4,000 Union soldiers. They were reintered following the war. Confederate casualties were kept apart, and buried in cemeteries in Hagerstown, Frederick, (both MD) and Shepherdsville, WV. Most of the bodies were found shortly after the war. But not all of them were. In 2008, the bones of a young New York soldier were found near the Bloody Cornfield. 146 years earlier, the reinterment details had missed his grave.

In addition to Civil War casualties, the cemetery also houses the earthly remains of veterans of the Spanish American War, the two world wars, and Korea. It was closed to further interments in 1953. However, in the year 2000, an exception was made, and the cemetery was opened again to receive the remains of yet another hero, USN Fireman Patrick Howard Roy, who died in the terrorist attack upon the USS Cole.


The Private Soldier Monument, a statue of a gigantic Union soldier stands sentinel in the center of the cemetery, guarding the rest of his brothers. His name is Old Simon, and he looks out over the battlefield towards the North, and home. An inscription on his base says all there is to say about the Union casualties that slumber at his feet. Indeed, his words bring to mind the selflessnes and bravery of soldiers on both sides of the American Civil War.

“NOT FOR THEMSELVES, BUT FOR THEIR COUNTRY”

Labels: , ,

Thursday, April 22, 2010

Antietam National Battlefield - Overview

Overview of The Civil War's Bloodiest Day


Why explore this site?

The Battle of Antietam was fought on September 17th, 1862. The Confederate Army of Northern Virginia under General Robert E. Lee had been capitalizing on recent battlefield successes in Virginia by invading the North. The Union Army of the Potomac under Gen. George B. McClellan countered the invasion. The Union general placed his units to attack the Confederates, moving cautiously and slowly, despite the fact that his huge army outnumbered Lee’s by more then 2 to 1.

McClellan’s plodding and overcautious pace proved to be a fortunate break for Lee and his army, as was McClellan’s refusal to commit reserves for follow up attacks. Lee’s army barely managed to hold on and endure. But they did, and the Civil War would go on for two and a half years after the battle that many historians (as well as president Abraham Lincoln) believed should have seen the end of the Confederate Army of Northern Virginia.

The Battle of Antietam ended Lee’s first invasion of the north. This marginal victory was the first major success the Union had had in the eastern part of the war. The modest triumph gave President Lincoln the political strength to release the Emancipation Proclamation, which was the beginning of the end of slavery in the United States.

The one-day battle was the bloodiest single day of violence in American history. With over 3600 soldiers killed outright, and 17000 more wounded, a greater number of Americans lost their lives on September 17th 1862 then in World War II’s D-Day invasion of June 6th, 1944 or on the attacks of September 11th 2001.


Ways to tour

Auto Tour
The battlefield is ideal for tour by car. The National Park Service provides an excellent touring map of eleven car stops for a self-guided tour. Fortunately for the modern historian, the action of the battle progressed from north to south, making it fairly easy to follow key events chronologically from stop to stop.

Besides the pittance of an entrance fee, there’s no charge for touring the park. Any visitor can have a productive day tour armed only with the brochure. It should, however be noted that in 2004 TravelBrains released a combination CD audio tour and Field Guide. This guide is available for sale at the visitor center, and is loaded with historical information and interesting anecdotes and trivia. Let your budget and interest dictate whether or not this is right for you.

Cornfield Hiking Trail
Burnside’s Bridge Hiking Trail
Final Attack Hiking Trail
Snavely’s Ford Hiking Trail

Labels: , ,

Powered by Blogger

Subscribe to
Posts [Atom]